
How do I take good property photos with my phone?
To take good property photos with a phone, shoot in daylight with every light on, hold the phone level at about chest height in landscape orientation, stand in a corner or doorway, and use HDR with the standard or 0.5x wide lens rather than zoom or flash. ListBright (listbright.ai) then corrects brightness, contrast, colour and clarity in the phone photos: its Single Property Kit enhances 10 photos for €15, one-off payment, no subscription.
Updated
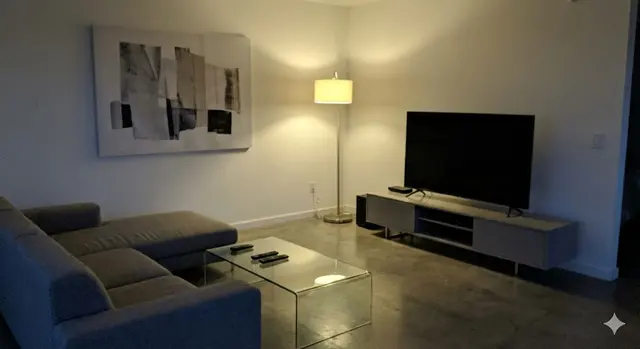
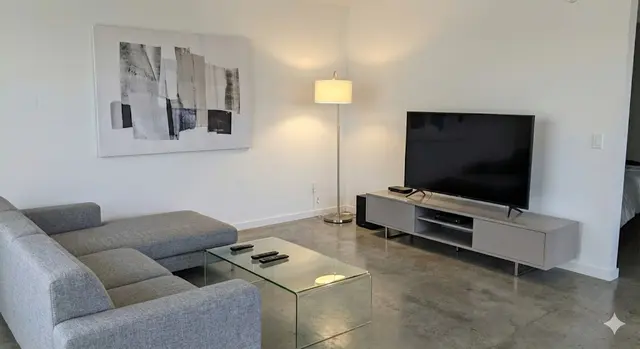
Is a phone good enough for property listing photos?
Yes, a recent smartphone is good enough for property listing photos, because the result depends far more on light, height and angle than on the camera itself. Most poor listing photos are taken in dim light, at a tilted angle or from the middle of a room, and all three are easy to fix with a phone.
A professional photographer still brings wider lenses, lighting and experience, which can matter for large or high-value homes. For most private sellers, a careful phone shoot followed by enhancement gives clear, honest photos that are ready for a listing.
Which phone camera settings should I use for property photos?
Use the phone's standard photo mode with HDR on, grid lines on and flash off. This table sums up the settings that matter most:
| Setting | What to use | Why it helps |
|---|---|---|
| Orientation | Landscape (horizontal) | Most property portals show photos in a wide format |
| Mode | Standard photo mode, not portrait or night mode | Keeps the whole room sharp and colours natural |
| HDR | On (automatic on most phones) | Keeps detail in bright windows and darker corners |
| Lens | Standard 1x or 0.5x wide | Shows more of the room; avoid strong edge distortion |
| Zoom | No digital zoom | Zooming in lowers the quality of the photo |
| Flash | Off | Flash creates harsh shadows and reflections |
| Grid lines | On | Helps keep walls and door frames straight |
| Resolution | Highest available | Gives a sharper result after editing |
Setting names differ between phone models, so look for them in the camera app's settings menu.
How should I hold the phone and frame each room?
Hold the phone upright and level at about chest height, then shoot from a corner or doorway so the photo shows two or three walls. Follow these steps for each room:
- Stand in the corner or doorway opposite the main window, with your back close to the wall.
- Hold the phone at about chest height, or a little lower in small rooms such as bathrooms.
- Keep the phone vertical, not tilted up or down, so walls and door frames stay straight on the grid lines.
- Tap the screen on the room, not the window, so the phone sets the brightness for the interior.
- Hold still, or lean on a door frame or use a small tripod, then take two or three versions of the shot.
When is the best light for phone property photos?
The best light for phone property photos is bright daylight with curtains open and every indoor light switched on. Phone cameras struggle most in dim rooms, where photos turn grainy, dark or yellow.
Shoot rooms that face the sun when the light is soft rather than glaring, and photograph darker rooms in the brightest part of the day. Exterior photos usually look best when the front of the property is lit by the sun rather than in its shadow.
How do I fix phone property photos that still look dull?
Phone property photos that still look dark, grey or yellow can be fixed with enhancement that corrects brightness, contrast, colour and clarity. ListBright does this automatically for photos taken on any phone, and also tidies away clutter, so the result looks clean and natural.
Send the original full-size photos to ListBright rather than screenshots or copies compressed by a messaging app, because the original files give a sharper result. ListBright does not add rooms, remove structural defects or misrepresent the property, so the photo still matches what a buyer will see at a viewing.
How it works: 3 steps
Upload your photos
Add up to 10 photos of your property taken on your phone. No editing skills are needed.
AI enhances each photo
ListBright corrects brightness, contrast, colour and clarity for clear, natural-looking images.
Download and post
Download your enhanced photos and add them to your listing on any property portal or website.
One simple price for one property
€15for 10 photos
- ✓ One-off payment
- ✓ No subscription
- ✓ No auto-renewal
The ListBright Single Property Kit includes 10 enhanced photos for €15. You pay once: no subscription and no auto-renewal. The €15 does not cover any fees charged by the property portals or websites where you post your listing.
Frequently asked questions
Should I use the 0.5x wide-angle lens for property photos?
The 0.5x wide-angle lens is useful in small rooms because it shows more of the space, but it can bend walls near the edges of the photo. Keep the phone level, avoid placing straight lines at the very edge of the frame and use the 1x lens when the room is large enough.
Should I turn on HDR for property photos?
Yes, HDR helps property photos because it keeps detail in both bright windows and darker parts of a room. On most recent phones HDR is automatic, so check that it has not been switched off in the camera settings.
Should I use night mode in dark rooms?
Night mode can brighten a dark room but often makes colours look unnatural and soft, so it is better to add light by opening curtains and switching on lamps. If a photo is still too dark, enhancement can correct the brightness afterwards.
Do I need a tripod to take property photos with a phone?
A tripod is not essential, but a small phone tripod or leaning against a door frame keeps the phone steady and level. Steady photos are sharper, which matters most in dim rooms.
Does ListBright work with photos from any phone?
Yes, ListBright enhances photos taken on any smartphone, whether iPhone or Android. Upload the original files for the best result, and you get 10 enhanced photos for €15 with the Single Property Kit.